Bind additional address fields to an address block for use with verification
With the required fields created for address verification, they now need to be added to the address block followed by enabling address verification.
- Go to
App Launcher | AddressTools Administration. - From the sidebar, navigate to
Address Blocks. - Select
Editnext to the address block you want to modify. - Locate the
Additional Address Fieldssection. - Bind the
Address Statuspicklist toStatus Field. - If applicable, bind the
Countyfield in theCounty Fieldoption. - If applicable, bind the
Address Labelfield in theAddress Labeloption.

Enabling address verification for an address block
Once the field(s) are bound:
- Scroll down to
Address Verification Options. - Check
Enable Premise-Level Address Verification. - Select
Save.
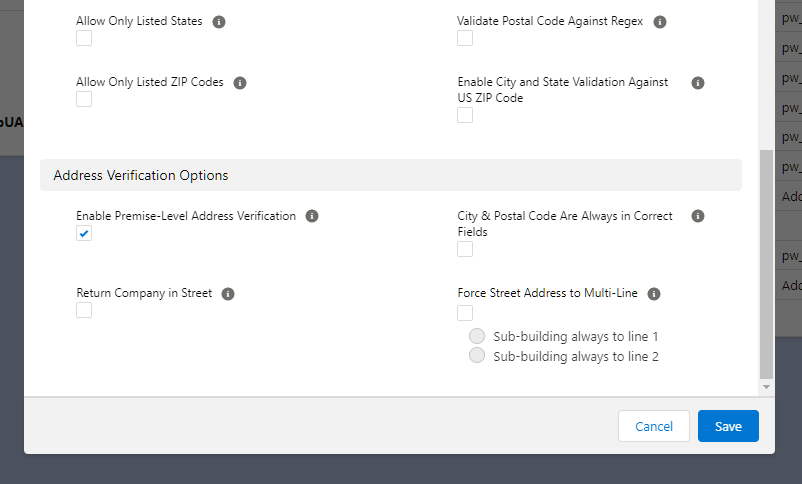
Additional address verification options for an address block
Return Company in Street– To return a company/organization value when verifying an address, enable the checkbox for the address block. This will return the registered company/organization value to the first line in the configured street field.City & Postal Code Are Always in Correct Fields– If your address data in Salesforce is always in the correct fields, it is recommended to check this option. It can reduce the number of ambiguous responses by providing a more defined query. If your address blocks have the potential to contain data in the incorrect address fields, this can result in Not Matched responses.Force Street Address to Multi-Line– For specific use-cases where a sub-building value must solely appear on a separate line to the rest of the street address, you can use Force Street Address to Multi-Line and choose Sub-Building Always to Line 1 or Sub-Building Always to Line 2. This setting is only recommended for organizations with such specific requirement.