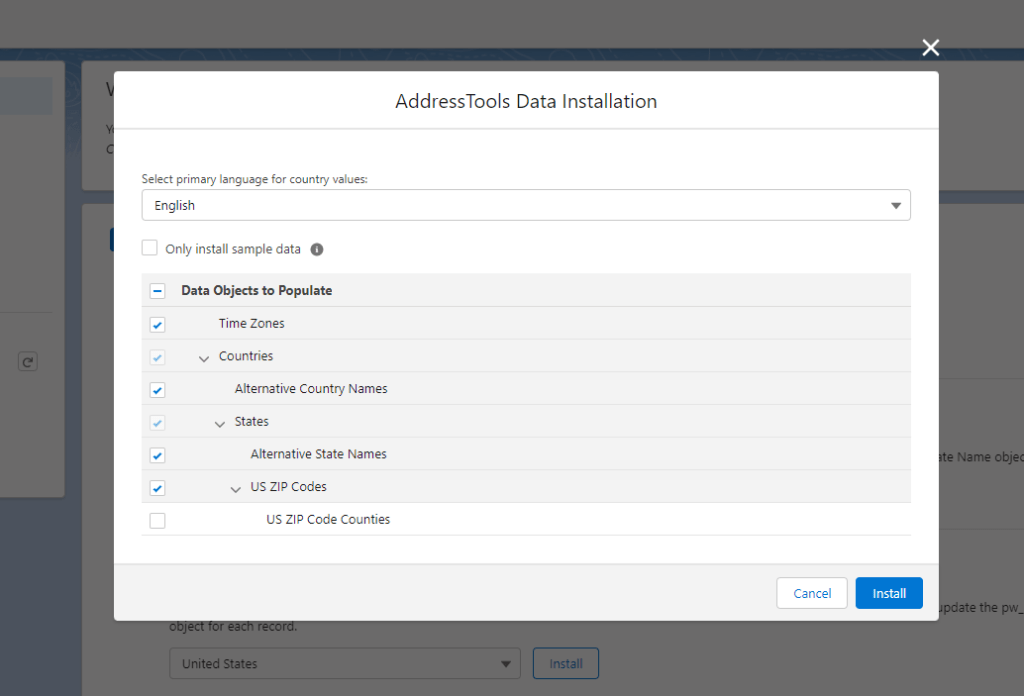
What’s installed during data installation?
When data installation is run, you have the option to install data to the following custom objects that are installed with the AddressTools package:
Countries (mandatory)States (mandatory)ZIP Codes (US only)ZIP Code Counties (US only)Time ZonesAlternative Country NamesAlternative State Names
The data installed into these objects acts as the backbone for AddressTools’ standardization and validation rules, and can also be customized to meet your business needs.
Furthermore, during the initial run of data installation, the following address blocks are configured within AddressTools to quick start your implementation:
Account - Billing AddressAccount - Shipping AddressContact - Mailing AddressContact - Other AddressContract - Billing AddressContract - Shipping AddressLead - Address
How to run data installation for the first time
Warning – before running the data installation, check your organisation’s storage limit. This can be seen at a glance in the Overview panel in the AddressTools Administration tab. There’s a lot of data to install so ensure you’re not going to exceed it. This can be common in a sandbox or developer org.

To get started:
- Go to
App Launcher | AddressTools Administration. - Use the
Get Startedbutton under Data Installation. - Select a Language.
- If you’re using a sandbox, it is recommended to check the
Only install sample datasetting. - Select the
Data Objects to Populateusing the checkboxes. - Select
Install. - Read the warning and then
Yeswhen ready.
The full data installation process can take a while, so now might be a good time to grab a coffee and read through the “Understanding” articles available in the rest of the installation walkthrough.


