If you, like many of us, have been eagerly awaiting the custom address field type in Salesforce (it’s only been like 10 years or so?), then you’ll be pleased to hear that Salesforce has announced it is in Beta from the Summer ‘22 release!
At ProvenWorks we’ve been fortunate enough to participate in the closed pilot since day one so we have been able to follow its progress. We’re now excited to be able to share with you some information so that you can be prepared for its release.
Isn’t the custom address field just like the standard address field type?
Sort of – however, be prepared that State & Country picklists are enforced for all new custom address fields in Salesforce, regardless of your existing org settings. This is largely why we’re writing this article.
State & Country picklists provide a neat solution for ensuring clean data at the point of entry, but admittedly, we’ll be the first people to warn you about the integration issues, customization headaches, and maintenance anxiety you may face when using Salesforce State & Country picklists.
…Nevertheless we are address experts in Salesforce so we’re going to embrace State & Country picklists head on and let you know how to prepare if you wish to migrate from custom text fields to the new address field type.
❗ Important: If you’re steering clear of State & Country picklists and you wish to remain using text fields then keep doing what you’re doing! There is no need to change if it works for you. The rest of this article may still be helpful to understand how to standardize data stored in State and Country text fields.
Standardization is critical
Keeping org data clean is the driving force behind Salesforce’s decision to enforce State & Country picklists for the new field type. If you, like many others, have been excited to migrate away from five custom text fields to a single address compound field, then we’re going to have to standardize that data before the migration process.
The rest of this article will walk you through a fast and efficient way to standardize your existing data from within Salesforce using AddressTools Premium. We’ll cover two approaches:
- Create a standardization trigger leveraging AddressTools and run a “mass update” to execute the logic.
- Export a standardized list of address data ready for reimporting back into Salesforce.
Both approaches require the same initial steps for configuring AddressTools’ standardization functionality so we’ll start there and break out into the two options later.
The use case
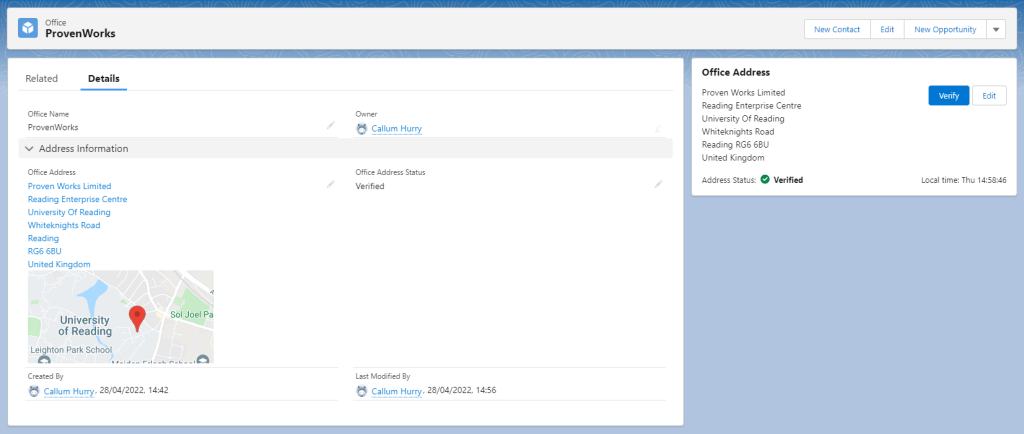
The scenario we’ll be following will be looking at a custom object called “Warehouse”. The Warehouse object contains five custom text fields that when put together create an address. We will refer to these fields collectively as an “address block”.
The five custom fields are:
- Street
- City
- State
- Postal Code
- Country
The fields are populated from a number of different sources – web forms, integrations and user entries – so we cannot guarantee that the data is standardized.
To prepare this data we’re going to expedite the process by using AddressTools Premium available on the AppExchange. As users (and developers) of the package we have heaps of experience and even some hidden tricks that’ll save days. It shouldn’t take more than a couple of hours from start to finish.
Installing the AddressTools Premium trial
If you’re not already using AddressTools Premium in your organization you’ll need to first install it from the AppExchange. You can do this in a sandbox if you want to test the functionality before pushing it to production.
Note: AddressTools Premium is a paid-for product that comes with a 14-day free trial. This could save you days of work so the cost may be something worth considering, especially if you have wider address requirements.
- Go to the AddressTools Premium AppExchange listing.
- Select
Get It Now. - You may be prompted to log in if not already.
- Select
Install in ProductionorInstall in Sandboxdepending on your requirements. It is best practice to test in a sandbox before moving to production. Agreeto the terms and conditions.- Select
Confirm and Install. - You may be prompted to log in again. If so, log into the org you want to install the package to.
- Select
Install for Admins Only. - Press
Install. - Check
Yes, grant access to these third-party web sites. - Select
Continue.
Let the process install the package. AddressTools Premium has a lot of features so it may take some time to install (you may receive a warning saying it’s taking a long time, this is normal). When the package has completed its installation you’ll receive a success email.
Once the package has been installed, navigate to the AddressTools App (via the App Launcher) and open the AddressTools Administration tab. You’ll immediately be on the Installation sub-tab.

- Under the
Installationtab, selectCreate Token. - A green tick will appear next to the first step.
Next we’ll want to install the AddressTools Premium dataset. This is a list of countries, states, alternative names, ISO codes, (and heaps of other address-related data).
Warning: This dataset is large. Ensure you have enough storage available if you’re testing this in a sandbox. If your allocated storage is low or you are unsure you can select Only install sample data but beware this will not populate any alternative country and state values that will be used to expand the acceptable standardization data for countries and states. This can be manually added later if you so wish.

- Under
Data Installation, selectGet Started. - Optionally choose Only install sample data.
- Select
Install. - A final warning will appear in relation to storage size. When you’re ready press
Yes.
This may take some time and will preconfigure some functionality for your org. Feel free to continue reading this guide so that when you’re done you’ll be ready to rock.
- Once the installation has finished,
refreshthe page to see that green tick.

Disabling the out-of-the-box functionality
A trigger is provided out of the box for the Account, Contact, Contract and Lead objects. If this is a fresh installation of AddressTools Premium in your org we’ll want to disable these triggers so that we don’t impact current business processes when we begin enabling functionality further down the line.
After the data installation:
- Select
Settingsfrom the left navigation. - Scroll to
Trigger Settings. - Disable each of the trigger settings in this section.
- Select
Save.
If the address fields you want to standardize exist on one of the four objects, the triggers can be re-enabled at a later point.
Configuring the address block
As mentioned earlier we’ll be referring to the five custom text fields as an “address block”. We need to configure AddressTools Premium with each of the text fields. This will allow the tool to execute standardization on the custom State & Country fields.
- On the
AddressTools Administrationpage, selectAddress Blocksfrom the left navigation. - Use the
Addbutton in the top right. - Select the object where your address block exists. We’re choosing Warehouse__c.
- If you have record types enabled on the object, leave
Nonechosen. - Select
Next. - Under Postal Address Fields, select the relevant fields for each picklist:
- Country
- State
- City
- ZIP/Postal Code
- Street
With the object and address fields now specified, it’s time to choose the settings we want to enable for the block.
Whilst still on the new address block modal:
- Scroll down to
Global Settings. - Check
Standardize Country. - Check
Standardize State.
Note: there are plenty of other settings here that may take your fancy. A tooltip is provided next to each giving you some insight into what’s available. You can come back to this page at any time should you wish to explore the other capabilities of AddressTools Premium.
- We’ll complete this step by selecting
Save.

Configure standardization values
Standardization is the process of converting multiple acceptable values to a single value. For example let’s take a look at the country Egypt:
- Full name – Egypt
- ISO-2 – EG
- ISO-3– EGY
- Local name (Latin characters) – Miṣr
- Local name (Native characters) – مِصر
Each of the above values are technically correct entries for Egypt but a picklist won’t allow all of these values to be entered. Using a text field to accept all the variations of the country name will ease the stress for end users, integrations and streamline future expansions of your org. It’s then best practice to standardize the values to a single preferred format for analytical purposes after the data is inserted.
To identify the acceptable values for each country we’ll take a look at the Countries object installed with AddressTools. This is one of the objects that the data installation will have populated records for and is fundamental to the standardization functionality.
- Select
App Launcher. - Search and select
Countries. - Select
Allfrom the available list views. - To help understand the data, select the United States country record from the list view.
Looking at the Country record, you can find dedicated fields for:
- Full name
- ISO-2
- ISO-3
- Local name (Latin characters)
- Local name (Native characters)
The good news is that each of these field’s values are automatically configured to be accepted in text fields configured with AddressTools Premium. When the AddressTools trigger functionality is enabled the values will be standardized to a defined format on insert and update.
Let’s take a look at another example for acceptable data by talking about United Kingdom, or do I mean Great Britain, or England?… You get where I’m going…
State & Country picklists don’t support the inputs of these variations, and these variations also don’t fit into the five dedicated fields on the Countries object. This is where we introduce Alternative Country Names.
- Whilst still looking at your existing country record, select
Related. - Select
Alternative Country Names.
This list may be empty depending on the country you’re looking at or because you only installed the sample dataset. Don’t worry, you can add as many records here as you find necessary.
To add a new Alternative Country Name:
- Select
New. - Write the value into the
Alternative Country Namefield. - Ensure the
Original Countryfield is populated with the Country. - Is Obsolete:
Unchecked. - Select
Save.
And it’s that simple, you’ve now added an Alternative Country Name that AddressTools will be able to identify during the standardization process.
The State object is configured similarly. To access States navigate to the related list on the Country record. For example, navigate to the United States Country record, select Related, and here you’ll find a list of states belonging to the United States.
Each State record has a:
- Full name
- ISO code
An Alternative State Name object is available where you can add a list of acceptable values. After all, we can’t seriously expect all our users to spell Mississippi correctly every time… So practically speaking if there are common misspellings or abbreviations you find in your org you can add them here to be standardized.
That covers configuring all of the acceptable values. Now we need to define the formats for the data to be standardized to.
Defining the standardized formats
Whilst we’re still looking at Country and State record data, we’ll configure the State format first.
This is managed on the Country record and can be controlled on a per-country basis.
- Navigate back to a Country record (i.e. United States).
- Enable or disable
Use Subcountry Code in State field.
This option can be enabled/disabled to standardize the state value to either its full name or ISO value (i.e. Texas vs TX).

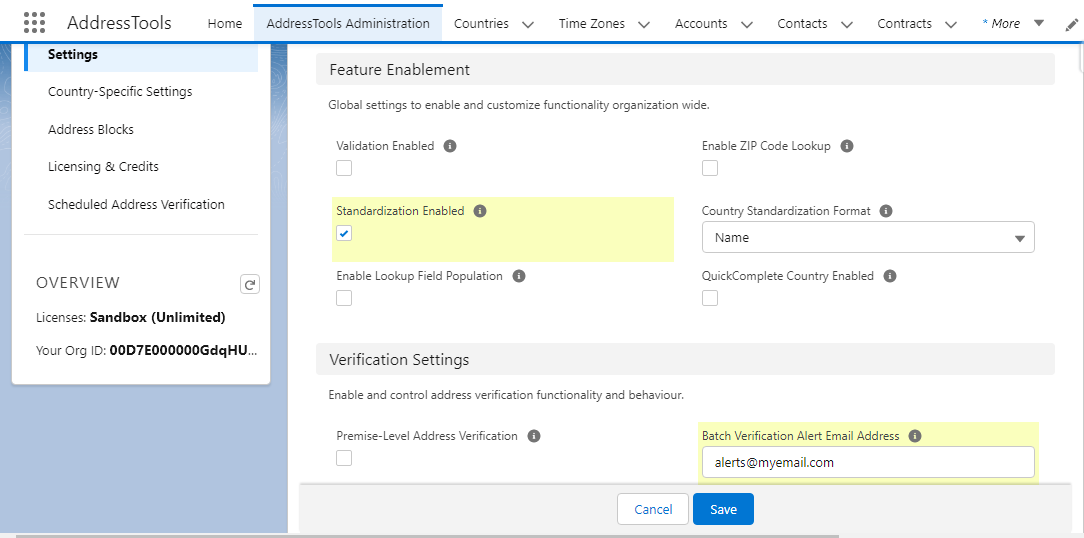
Lastly, we need to define the Country format. This is an org-wide setting and applies to all country values.
- Go to the
AddressTools Administrationtab. - Navigate to
Settingsin the left navigation. - Use the pencil icon next to
Standardization Enabled. - Check
Standardization Enabled. - Edit the
Country Standardization Formatto match the desired format. - Select
Save.
Note: These settings can be changed at a later date if you need to change your format. You’ll then need to run one of the following jobs to standardize the data to the new format.
It’s configured, now what?
We have two options to mass standardize the data:
- Enable a trigger on the object, run a mass update and have the trigger standardize all the data during the update.
- Invoke a job via the Developer Console to export a standardized list of data that can be manually reimported into Salesforce.
Choose the approach that best suits you. If you’re unsure what route to take we have instructions below walking you through both.
Option 1: Create a trigger on the object and run a mass update.
We’ve configured all the standardization settings so now we need to tell the object to follow them. As we’re working with a custom object in this example we’ll need to create a new trigger in the org to invoke the AddressTools functionality.
A trigger is provided out of the box for the Account, Contact, Contract and Lead objects. Follow the relevant steps to enable or create a trigger for the object where your address block exists.
If you’re working with either of the Account, Contact, Contract or Lead objects:
- Navigate to the
AddressTools Administratortab. - Select
Settingsfrom the left navigation. - Scroll to
Trigger Settings. Enablethe trigger on the object you’re standardizing.- Select
Save.
If you’re working with an object that isn’t Account, Contact, Contract or Lead:
- Go to
Setup. - Navigate to
Object Manager. - Locate the
Objectyou want to create the trigger for. - Select
TriggersandNew. - In the box, replace the existing code snippet with the following:
trigger ValidateOBJECTLABELCountryFields on OBJECTAPI (before insert, before update) {
    pw_ccpro.CountryValidator2.Validate(Trigger.new, Trigger.oldMap);
}- Replace OBJECTLABEL with the label name of the object you’re creating the trigger for.
- Replace OBJECTAPI with the API name of the object you’re creating the trigger for.
- Select
Save.
With the trigger enabled for the object, we need to turn on the standardization setting in the AddressTools Administration tab:
- Navigate to the
AddressTools Administratortab. - Select
Settingsfrom the left navigation. - Under
Feature Enablement, check the box forStandardization Enabled. - Confirm that the Country Standardization Format is set as you desire.
- Select
Save.
Before we do a mass update we can test the standardization functionality on our address block.
- Navigate to a record where your address block exists.
Editthe record.- Change the country text value to a variation of the value currently present (e.g. if the country is United States, change it to USA or US).
Savethe record.
The record will standardize to the format specified in the settings. (If you entered the desired format, the value won’t change on save as it’s already in the expected format. Try changing to another format to confirm the test).
Before save:

After save:

Now the test has been confirmed we need to invoke the trigger on all existing records. This will involve running an update on every record in the object. There are many different ways that you can achieve this so if you can already think of one then do what you know best.
If you need some guidance, we have a separate article on how to run a “mass touch” using Salesforce Flows. Check it out here.
Once the mass touch operation has successfully run, all State and Country values that matched the AddressTools dataset will now adhere to your defined standardization format.
There may be some leftover values and this will require some manual intervention. If you find a repeat offender you can add the value to the Alternative Country or State Name objects and re-run the process to catch them.
Option 2: Export the standardized data for importing later
Before we start, it makes sense to see the result of these instructions so let’s take a look at what our exported file will contain.
For every record on the configured object that can be standardized, the data will be exported with the following data in the file:
- Record ID
- Current text field values (Old)
- Standardized versions of the text field values (New).
Note: The export will ignore records that are already in the desired format or that contain data that cannot be standardized (i.e. an unrecognized value).

To prepare AddressTools Premium to execute this export:
- Navigate to the
AddressTools Administratortab. - Select
Settingsfrom the left navigation. - Under
Feature Enablement, check the box forStandardization Enabled. - Confirm that the
Country Standardization Formatis set as you desire. - Add your email address to the
Batch Verification Alerts Email Addressfield. - Select
Save.
This process will need permission to send an email to the email address configured in the previous section. You may need to change your org’s Email Deliverability settings to support this.
To check/change your Deliverability settings:
- Go to
Salesforce Setup. - Search for
Deliverabilityin the left search. - Select
Deliverabilityfrom the left navigation. - Make note of your existing
Access level, you can revert the setting back to this once you’re done. - Change
Access LeveltoAll email. - Select
Save.

For some of you reading this guide, you may not have worked with the Developer Console before so follow closely and let’s execute some Apex!
Note: If this is your first time we recommend doing this in a sandbox so you don’t affect any production data.
- Go to the
cogin the top right of your Salesforce page. - Select
Developer Console.
The Developer Console window will open in a new window.
- Select
Debug | Open Execute Anonymous Window. - Under
Enter Apex Code, type the code below
pw_ccpro.BatchValidateAndGenerateCSV M = new pw_ccpro.BatchValidateAndGenerateCSV('OBJECTAPI');
Database.executeBatch(M);- Change OBJECTAPI to the
API Nameof your Object. We’ll be typing ‘Warehouse__c’. - Select
Execute.
This will now begin the standardization process. The length of time it will take to execute will vary depending on how much data you have in your org.
Once the job is complete you will receive an email with a .csv attachment containing all of the standardized data from the address block ready for importing either into the existing fields or ready to migrate into your State & Country picklists.
And there you have it – your standardized file is waiting for you! When you’re ready to import this data back into Salesforce, use an importing tool* of your choice and ensure to update the records matching the Record ID found in column A.
Warning: Be vigilant when running mass update operations in a production environment. Where possible backup your data first.
*Pssst if you’re looking for a new favorite importing solution, why not try out SimpleImport for this import job!
Summary
So there you have it, we’ve walked through how to standardize your existing data ready for the new custom address field type in Salesforce using AddressTools Premium.
If you have found this guide to be helpful, please ensure you share it with others so that they can learn how to standardize their address data stored in text fields. If it has saved you time then it may save them time too!
If you have any questions about AddressTools and any of its capabilities we’d love to hear from you. Get in contact with us at sales@provenworks.com.