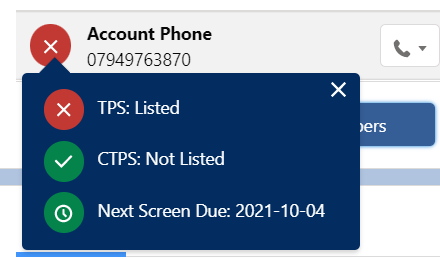
PhoneTools will now execute a batch job to screen all configured records that have not yet been screened or are overdue. This is calculated from the Next Screen Due date field on the records.
Within the Scheduled Screening section, select Enable Scheduled Screening to create a Scheduled Job that will execute each day, screening Not Screened and Overdue numbers.
To manage or delete the scheduled jobs, select Click here to view or delete scheduled jobs using the Salesforce Scheduled Jobs viewer.
PhoneTools will now have a daily job to execute a batch job to screen all configured records that have not yet been screened or are overdue. This is calculated from the Next Screen Due date field on the records.
If you’ve completed Adding the PhoneTools lightning component to a record app page then it’s good news! You have instant access to interactive record screening. As a system administrator, you can sample this functionality immediately by navigating to a record where the component is configured and click the Screen Phone Numbers button.
…But the interactive record screening feature is rarely just for use by a system administrator so permissions need to be granted to your users.
Granting permissions to use interactive record screening
Users wanting to use interactive screening must have the editable permissions to each of the phone status fields required by PhoneTools.
Phone Status Field
Next Screen Due Field
Screening Results Field
The users must also have at least read access to all the configured phone fields on the object. For example:
Phone
Mobile
These permissions can be granted on the profile itself or via a permission set.
To allow users in the organization to check the status of a phone number on a record, you will need to add the PhoneTools lightning component to the lightning record app page.
Go to Setup | Object Manager.
Navigate to the object that you would like to add the PhoneTools component to.
Select Lightning Record Pages.
If you already have a record page, select its label and press Edit. Or choose New if you would like to configure a new record page.
Select PhoneTools from the Lightning Components list on the left of the screen and drag the component to your desired location on your page layout.
In the panel on the right of the screen, select Enable screening.
Press Save, and Activate if required.
Note: you can use Add Filter to create rules for when the component is visible. i.e hide if phone field is empty.
Fields to screen is the heart of the application. It tells PhoneTools which fields in your organization need screening. PhoneTools will only screen phone fields that are configured and have the Enabled Screening checkbox enabled. We will cover this more in the article.
What’s available out the box?
Out of the box, PhoneTools comes configured with the following fields but by default, will NOT have Enabled Screening checked:
Account.Phone
Account.Fax
Contact.Phone
Contact.HomePhone
Contact.MobilePhone
Contact.AssistantPhone
Contact.OtherPhone
Lead.Phone
Lead.MobilePhone
Adding additional phone fields
You can add additional phone fields to the configuration.
Go to App Launcher | PhoneTools Administration.
Navigate to the Configuration tab.
Select Add Field.
Select the Object.
Select the Phone Field.
Choose the appropriate fields discussed in in the picklists.
Press Save.
Enabling screening on phone fields
With the phone fields now configured with PhoneTools, we can enable them for screening.
Go to App Launcher | PhoneTools Administration.
Navigate to the Configuration tab.
Select edit next to the field that you would like to enable screening for.
Select Enable Screening and four picklists will appear.
Choose the appropriate fields in the Phone Status Field, Next Screen Due Field and Screening results Field picklists (as discussed in the previous article).
Select Save.
Repeat this step for each field that is to be enabled for screening.
PhoneTools relies on three custom fields to store a records’ TPS and CTPS status, we call these the “functional fields”.
The three functional fields are:
Phone Status Field
Next Screen Due Field
Screening Results Field
We will use these fields later in the configuration.
If you are implementing PhoneTools on one of the out of the box object, the functional fields have already been created for these object and you can move onto the next article.
If you plan to use PhoneTools on another object, continue reading.
Creating the functional fields for an object
When you know which object you need to create the three fields for, follow the steps below.
We’ll start by creating the Phone Screen Status field:
Go to Object Manager, locate the Object, and go to Fields & Relationships.
Select New.
Choose the data type: Picklist.
Select Next.
Add a Field Label (we suggest ‘Phone Screen Status’)
Select Enter values, with each value separated by a new line.
Add the following values to the text area:
Not screened
Error
Safe to Call (not listed)
Caution (partially listed)
Do Not call (listed)
Select Next.
Provide visibility to all the users who will be screening records, this can also be handled in a permission set afterward if preferred.
Select Next and Save.
Now for the Next Screen Due field:
Select New.
Choose the data type: Date/Time.
Select Next.
Add a Field Label (we suggest ‘Next Screen Due’)
Select Next.
Provide visibility to all the users who will be screening record, this can also be handled in a permission set afterward if preferred.
Select Next and Save.
And finally for the Phone Screening Results field:
Select New.
Choose the data type: Text Area (Long).
Select Next.
Add a Field Label (we suggest ‘Phone Screening Results).
Leave the Length and #Visible Lines at their default values.
Select Next.
Provide visibility to all the users who will be screening record, this can also be handled in a permission set afterward if preferred.
Select Next and Save.
Now your fields are created, you’re ready to start configuring the “Fields to Screen”!
PhoneTools comes packaged with triggers for the following objects:
Account
Contact
Lead
This means that if you’re only screening fields on the above objects, there is no requirement to add a custom trigger to your organization and you’re ready to move on to the next step.
If you plan to use PhoneTools on another object, continue reading.
Creating a trigger
We’ve made it as straightforward as possible to add a custom trigger to any object in Salesforce allowing you to start screening any phone field against the TPS and CTPS databases.
Go to Setup.
Navigate to Object Manager.
Locate the Object you want to create the trigger for.
Select Triggers and New.
Paste the following code snippet into the box provided.
Replace OBJECTLABEL with the label name of the object you’re creating the trigger for.
Replace OBJECTAPI with the API name of the object you’re creating the trigger for.
Select Save.
Note: to deploy a custom trigger to production, you may be required to provide code coverage to the trigger. To do this, you will need to create an apex test to insert a record to the object you created a trigger on.
PhoneTools is a quick-to-launch TPS and CTPS screening solution for Salesforce CRM allowing your organization to assist with PECR compliance in minutes. The solution is built solely for Salesforce, by Salesforce experts.
Out of the box
Out of the box, PhoneTools supports the following objects:
Accounts
Contacts
Leads
This means that we have already:
Provided a custom trigger for each object
Created the required functional fields for each object
Configured the default phone fields in the “Fields to Screen” settings
This means if you’re using any of the objects and fields listed above, it’s a swift process to implement. If you’re not using the above objects or fields then don’t panic, we cover how to configure PhoneTools for these scenarios too!
How TPS and CTPS screening in Salesforce works
PhoneTools will screen any phone field that is configured in the package’s “Fields to Screen” settings. This means there is no code required to implement (with the exception of a formula if you would like to set up screening criteria, but we’ll cover this later!).
Each object that contains phone fields that need screening against the TPS and/or CTPS database must contain three custom functional fields to track the phone fields’ TPS and CTPS statuses. These fields will also identify when the next screen is due, and provide a summary status for the whole record. A description of these three fields can be seen below:
Next Screen Due Field – when a record is screened, a date stamp is added 21 days in the future. This will indicate when the record next needs to be screened. (You will not be charged any extra for screening a record more than once a month.)
Screening Results Field – a JSON output listing the results for each screened field. This is perfect if you’re interested in doing some custom development on top of the solution.
When a phone number is updated on a record, all three functional fields are set to NULL on the record. This indicates that the record needs screening. This can either be screened manually by your users, or have it automatically screened with a batch job.
When a record is screened, each of the functional fields will be updated in accordance with the response from the PhoneTools service.
How can my users tell what’s safe to call?
A Lightning component needs to be added to the users’ record app pages. This provides a breakdown of the statuses for each configured phone field to screen. See more information about the phone statuses.
The Phone Status Field noted earlier in will also contain a summary status for each record. This can be used in reports to quickly identify records that have all numbers listed on either database, no number listed on either database, or records that contain some numbers that are listed on either database.
PhoneTools is one of the quickest ways to begin screening your Salesforce records against the UK-TPS and UK-CTPS databases to check whether the numbers are safe to call. This installation walkthrough will get you set up with a basic configuration in no time so you can rest easy and know you have a solution in place.
To provide the best experiences, we use technologies like cookies to store and/or access device information. Consenting to these technologies will allow us to process data such as browsing behavior or unique IDs on this site. Not consenting or withdrawing consent, may adversely affect certain features and functions.
Functional
Always active
The technical storage or access is strictly necessary for the legitimate purpose of enabling the use of a specific service explicitly requested by the subscriber or user, or for the sole purpose of carrying out the transmission of a communication over an electronic communications network.
Preferences
The technical storage or access is necessary for the legitimate purpose of storing preferences that are not requested by the subscriber or user.
Statistics
The technical storage or access that is used exclusively for statistical purposes.The technical storage or access that is used exclusively for anonymous statistical purposes. Without a subpoena, voluntary compliance on the part of your Internet Service Provider, or additional records from a third party, information stored or retrieved for this purpose alone cannot usually be used to identify you.
Marketing
The technical storage or access is required to create user profiles to send advertising, or to track the user on a website or across several websites for similar marketing purposes.